Elegant Halloween Wreath Tutorial From Dollar Tree
Note: As an Amazon Associate, I earn from qualifying purchases. If you click on a link from Amazon or another of my advertising affliates, I will earn a small commission at no additional cost to you. Please see my full disclosure policy here.
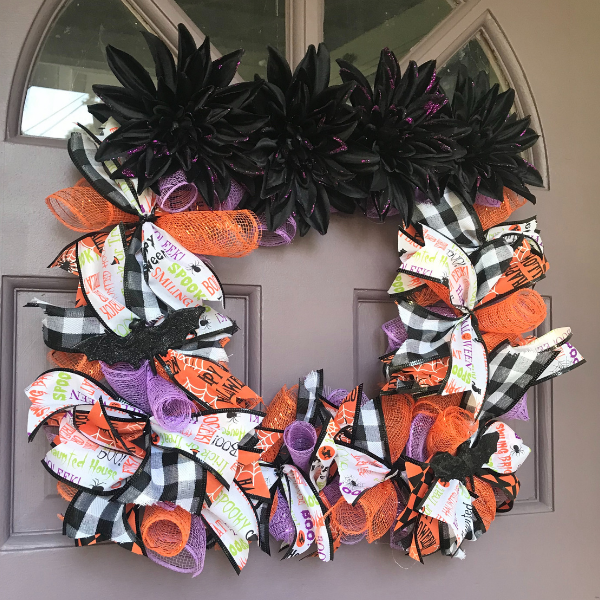
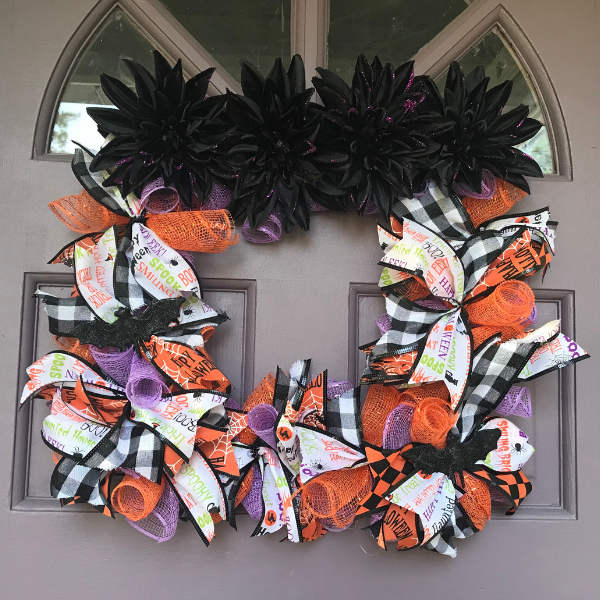
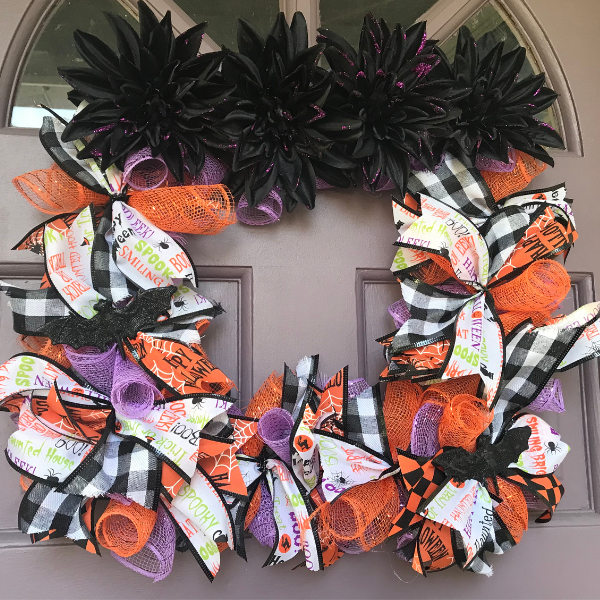
Who’s ready for Halloween? At my house, we starting thinking about Halloween in August. As soon as Halloween decorations come out in the store, my family is all over it. When I saw these pretty black Dahlia florals at the Dollar Tree, I knew I had to have them. I had no idea what I was going to do with them, but it was easy to figure out. Here is my full halloween wreath tutorial from Dollar Tree for this elegant Halloween wreath.
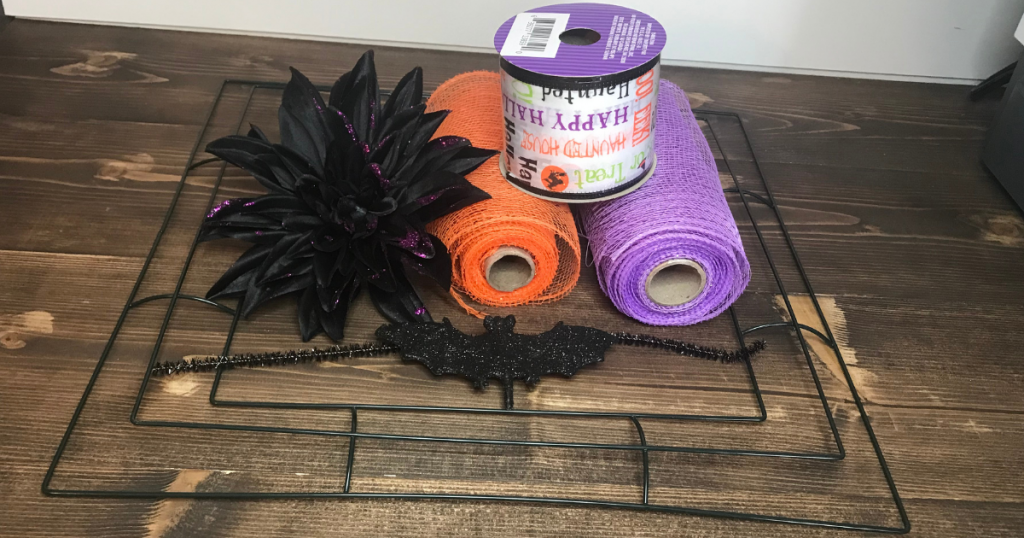
I basically made this Halloween wreath with mostly items from my craft stash, but they can still be found at the Dollar Tree. From my stash I had Halloween ribbon, orange and purple deco mesh and black pipe cleaners leftover from my Deco Mesh Halloween Garland. New this year I bought the black Dahlia clips and the square wire wreath form. The glittery black bat clips were in my stash and I have no idea why I bought them, but I’m so glad I have them.
Materials for Easy Dollar Store Halloween Wreath
Square Wreath Form
Black Pipe Cleaners/Floral Wire
Wired Halloween Ribbon
Scissors
Ruler or Craft Mat
1 Roll of Purple Deco Mesh
1 Roll of Orange Deco Mesh
4- Black Dahlia Clips
Bat Clips
On my deco mesh wreaths, I like more ribbon than deco mesh. So for my deco mesh wreath tutorials, I always start with decor mesh, but add lots of ribbon on top. Remember add as many sets of ribbon and deco mesh for the fullness that you like. Everyone does it differently, so I hope you enjoy this Halloween wreath tutorial and ideas.
Elegant Halloween Wreath Tutorial From Dollar Tree
Preparing the Deco Mesh Wreath Form

Clip the Dahlia clips to the top row of the square wire wreath form.
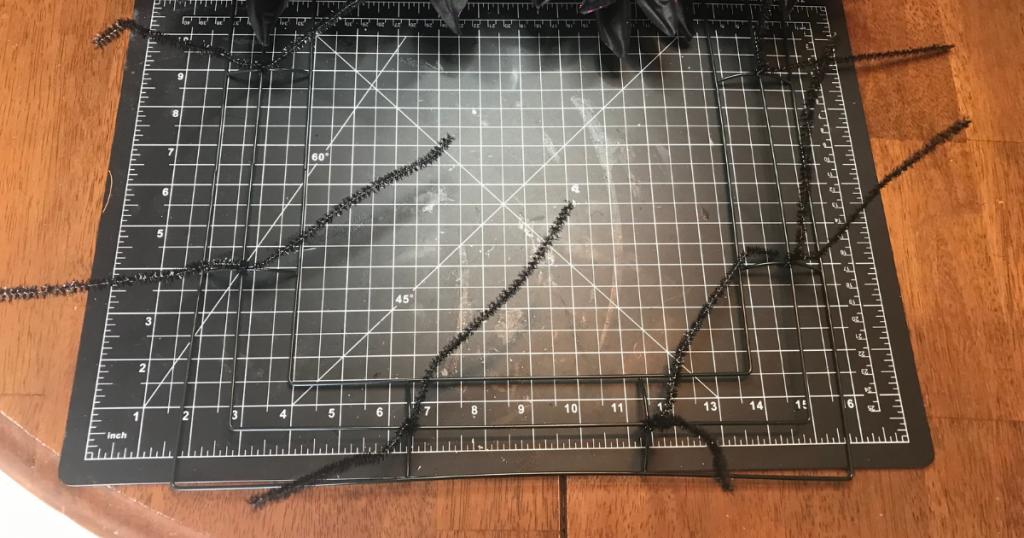
Wrap the pipe cleaners around the center wire of the square frame where the wires intersect all around the wreath.
I didn’t realize that the deco mesh and ribbon were not long enough to overlap until I had half the wreath done. So I went back and added floral wire to the missing sections. I ran out of pipe cleaners and I was to lazy to go to the store to get more. After using floral wire and pipe cleaners, I really prefer the pipe cleaners and found them easier to twist tightly for the wreath.
Cutting the Deco Mesh and Ribbon
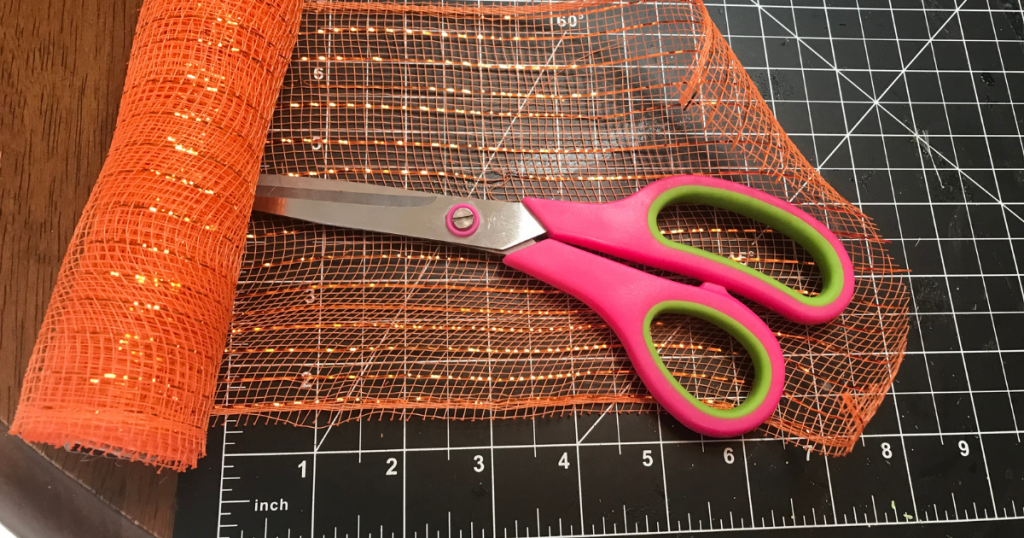
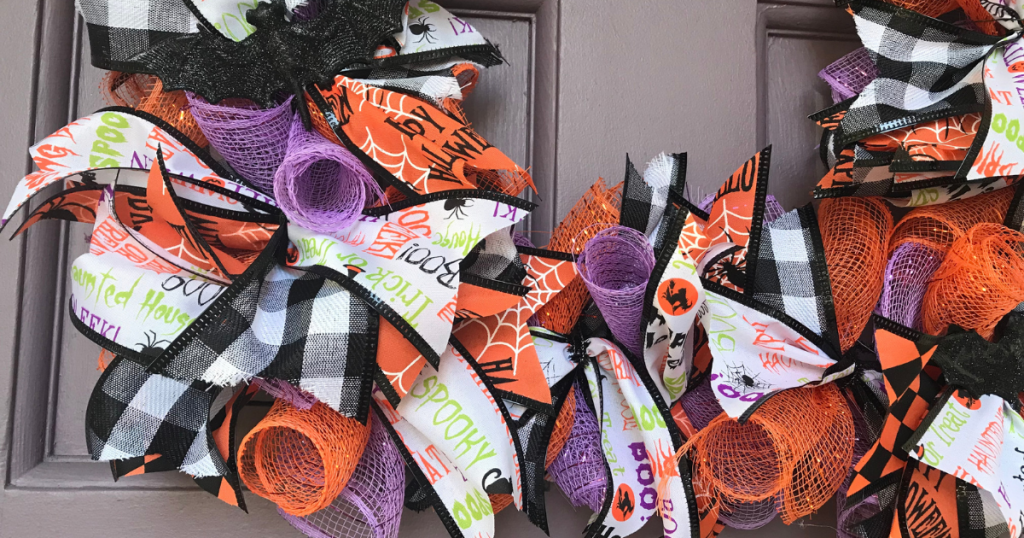
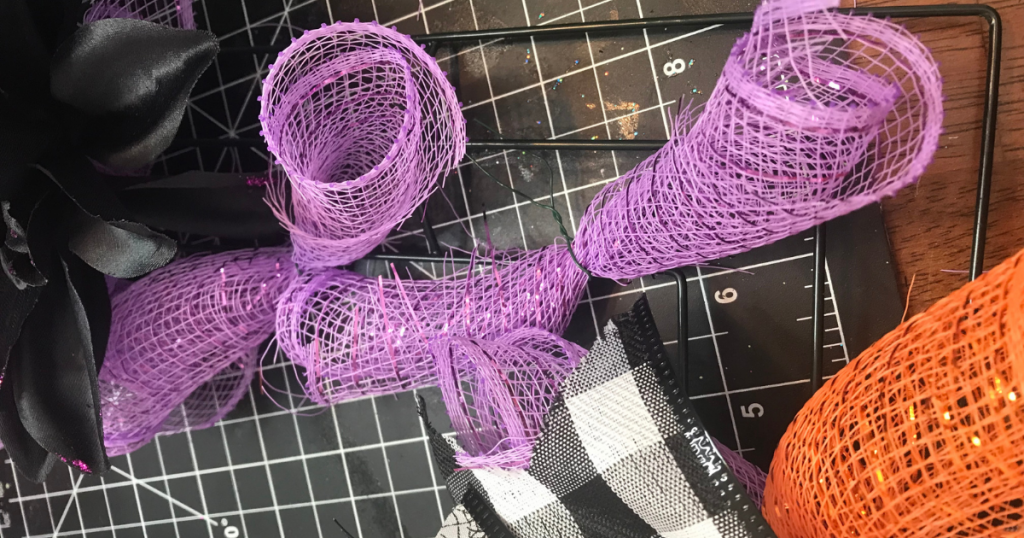
When the wreath form is ready, start cutting the purple and orange deco mesh pieces about 8 inches long. Then cut the ribbon about 8 inches long and dovetail the ends.
Adding the Deco Mesh and Ribbon to the Square Wreath Form
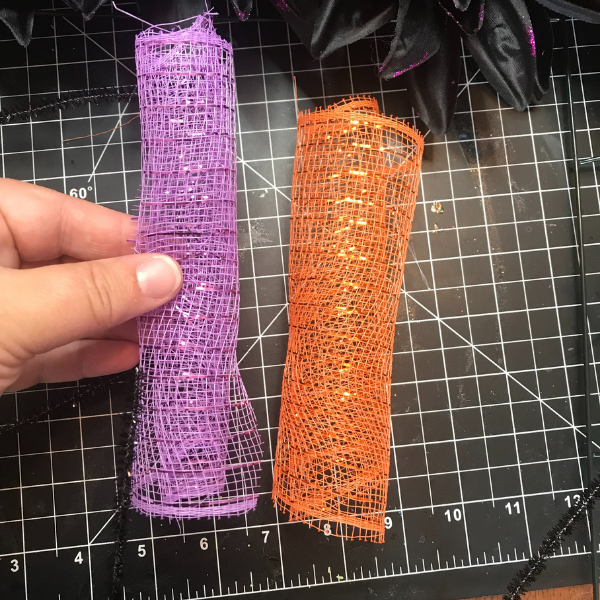
Roll the orange deco mesh tightly and the purple decor mesh.
Lay the orange deco mesh on top of the purple and attach to the wreath form by twisting the pipe cleaner around it.
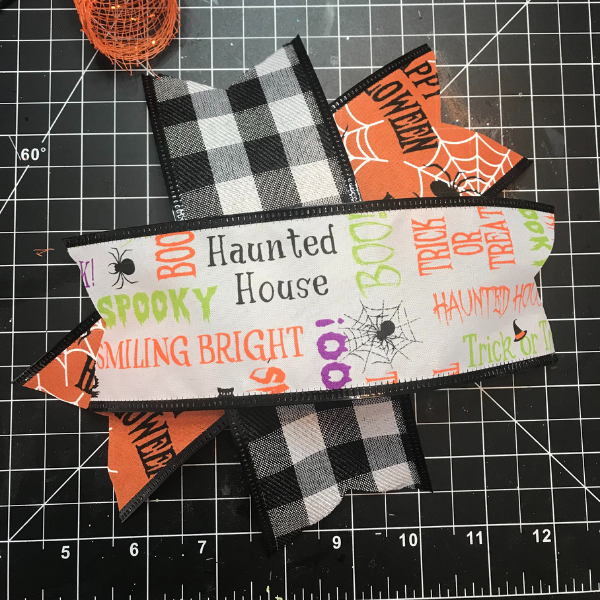
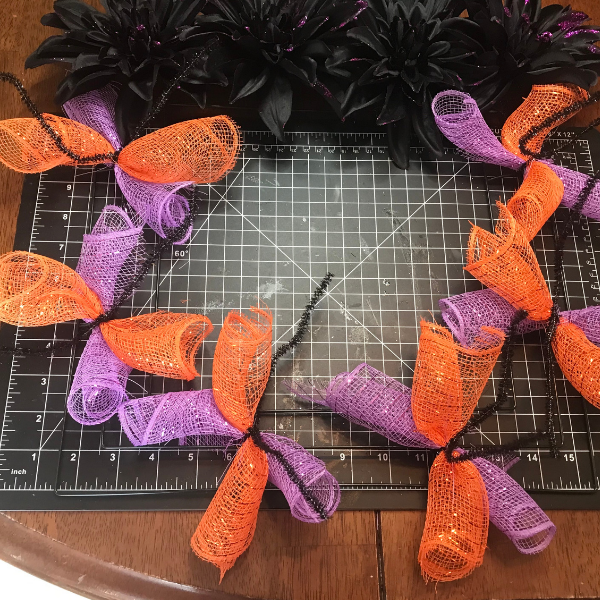
Next layer the ribbon on top of each other in an x and attach on top of the decor mesh. Don’t worry about spreading and fanning out the ribbon until the whole wreath is done. It will look a little rough, but once you start spreading the ribbon, your Halloween wreath will look amazing.
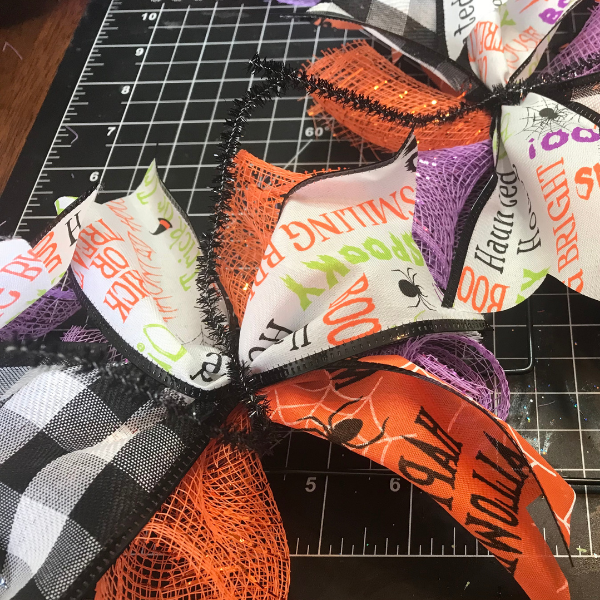
Repeat this step all around the dollar store halloween ribbon wreath. Spread out all the ribbon and start filling in the empty spaces with the above step. I did each corner and added a third set on each side of the wreath. When I first saw the empty spaces, I was going to take apart the wreath and start over, but that was much harder than adding ribbon sets in. When the ribbon is all done, fold the wire or pipe cleaners down and under the ribbon.
I decided the florals needed a little something so I unclipped the Dahlias and cut 5 inch pieces of purple deco mesh. I rolled the deco mesh and attached it to the bottom row of the wreath form all the way across. Then I clipped the Dahlias back onto the middle row of the top of the square wreath form.
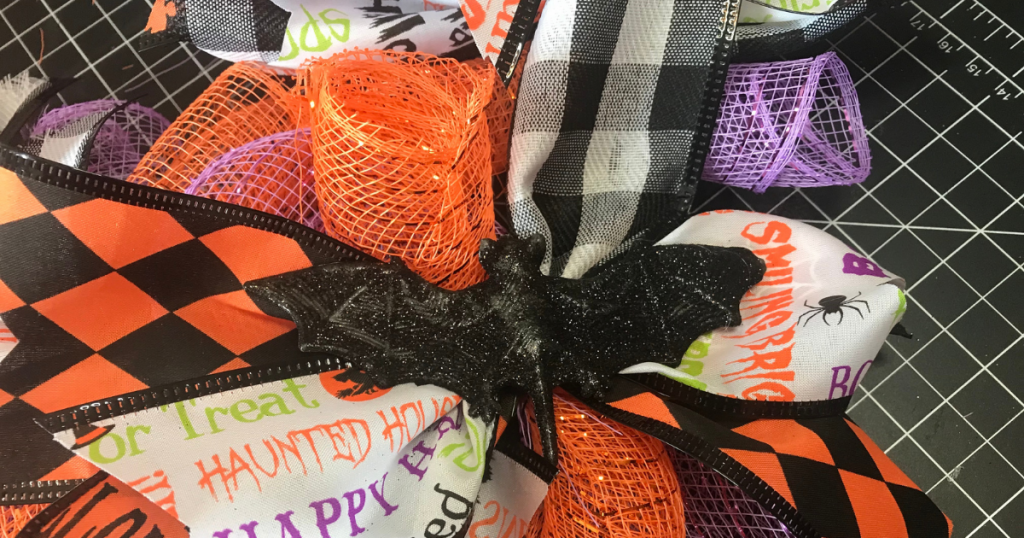
To finish off the DIY Halloween wreath, I hot glued a couple glittery bat clips to the wreath. The clips popped off easily and I hot glued the bats to the center of the ribbon sets.
I just tied a piece of twine on the wreath form to hang it on the door.
Elegant and Easy Deco Mesh Halloween Wreath
I really like the elegant Halloween look of this wreath. The wreath cost about $10 to make which is a great deal. I like to do cute for Halloween, not spooky and this wreath is very sophisticated to me. Can Halloween wreaths be pretty because this one is. It’s going to look fabulous with the deco mesh garland around the door.