Simply Crafty Life

Magical Moments Crafted With Love

  • Home
  • Crafts + DIY
    • Wreaths/Door Decor
    • Crafts for Decor
    • Crafty Ideas
    • Kids Crafts
  • Cricut
    • Tutorials
    • Cricut Joy
    • Projects
    • Cards & Tags
    • Scrapbooking
  • Holiday & Celebrations
    • Birthday Parties
    • Gift Ideas
    • Valentine's Day
    • St. Patrick's Day
    • Spring and Easter
    • Summer & 4th of July
    • School Ideas
    • Halloween
    • Fall & Thanksgiving
    • Winter & Christmas

May 9, 2018

Fun Summer Paper Wreath

Wreaths/Door Decor

Make this bright and fun summer paper wreath to decorate your front door. Learn how to design this in design space and cut it on your Cricut Maker

Note: As an Amazon Associate, I earn from qualifying purchases. If you click on a link from Amazon or another of my advertising affliates, I will earn a small commission at no additional cost to you. Please see my full disclosure policy here.

Share this post:

Share on PinterestShare on FacebookShare on X (Twitter)Share on Email

I started crafting with paper many years ago when I began scrapbooking. I fell in love with all the pretty scrapbook paper. The one thing I have never made is a paper wreath and I love wreaths! Finally I made a Fun Summer Paper Wreath and I had so much fun doing this. I can’t wait to make some more.

Supplies for Paper Wreath

Card Stock- green, pink, purple, orange, yellow, black
Glitter Vinyl Self Adhesive – pink, purple, black
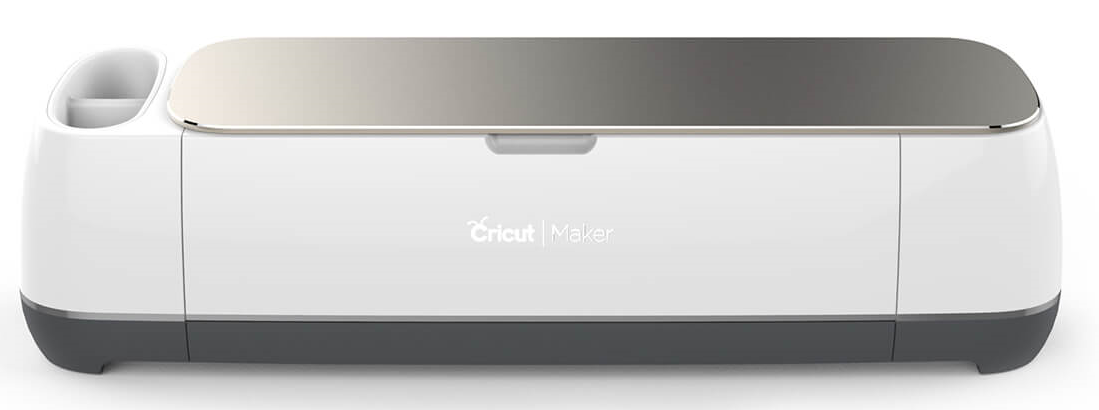
Cricut Maker
Double Sided Adhesive
Glue Gun
Glue Dots
10 inch Foam Wreath (Dollar Tree)
Black Ribbon
White Ribbon
Cricut Design Space File

Let’s Create a Fun Summer Paper Wreath

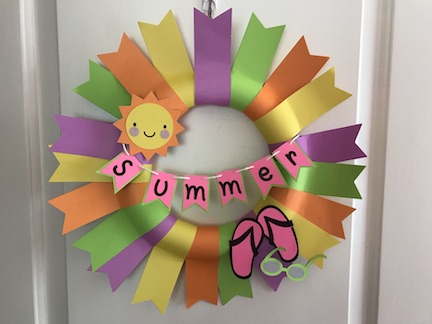
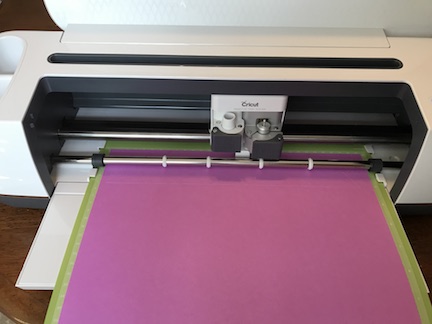
In Cricut Design Space™ using my Cricut Access Premium I created the banners, the sun, the summer banner, and the flip-flops and sunglasses image. All of these images are available in Cricut Design Space. Then I cut all the images on my Cricut Maker in the card stock and the glitter vinyl.

Make this bright and fun summer paper wreath to decorate your front door. Learn how to design this in design space and cut it on your Cricut Maker

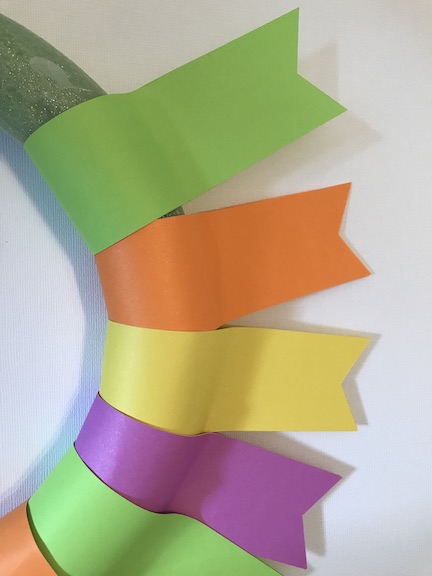
I used glue dots to add the banners to the wreath. Just wrap the banner around the wreath and use a couple glue dots, more is better for this project. I put the glue dot closest to the wreath because it made the paper stay together better. Sometimes the paper still came undone, so I went in with the hot glue gun and glued the paper together. I didn’t glue anything to the wreath.

Make this bright and fun summer paper wreath to decorate your front door. Learn how to design this in design space and cut it on your Cricut Maker

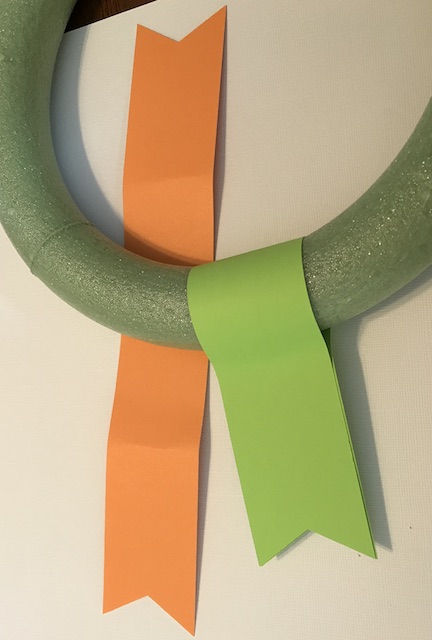
I did the card stock in a pattern around the wreath.

Make this bright and fun summer paper wreath to decorate your front door. Learn how to design this in design space and cut it on your Cricut Maker

Then I glued the cute sun with some glittering cheeks, the banner in the center, and the flip flops and sunglasses at the bottom together. Each image has a touch of sparkle with the glitter vinyl.

Make this bright and fun summer paper wreath to decorate your front door. Learn how to design this in design space and cut it on your Cricut Maker


$1 Craft Supplies at Dollar Tree!

These images just make you smile and wish it was summer now! I left extra ribbon on the summer banner to glue the extra ribbon on the back of the wreath. To hang the wreath, I added a black ribbon to the back of the wreath with hot glue.

Make this bright and fun summer paper wreath to decorate your front door. Learn how to design this in design space and cut it on your Cricut Maker
Shop new arrivals from Cricut!

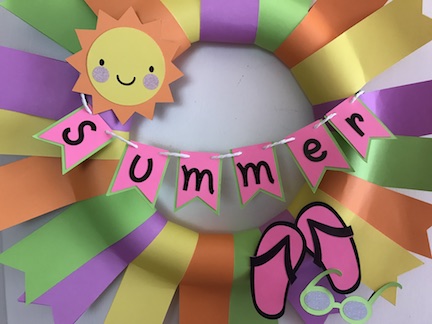
This wreath is colorful, bright, and cheery! Everyone will be smiling when they walk into our home after seeing this cute wreath. I had so much fun making my first paper wreath and I’m excited to make more, plus I love a project that uses paper from my paper stash. My favorite things about summer our on this wreath- sunshine, sunglasses and flip flops!

Make this bright and fun summer paper wreath to decorate your front door. Learn how to design this in design space and cut it on your Cricut Maker


« How to Use the Cricut Pens and Writing Feature
Flip Flop Summer Sign »

Welcome


Jenny's image

HI I’m Jenny and I live a simply crafty life.

I love easy DIYS and crafts to create decor for my home, holidays and special occasions.

I’m always planning a new project in my mind or I’m figuring out how to make something that I saw (daydreaming about crafty projects is my thing).

You can find me at my craft table with my Cricut, coffee, and glue gun.

I hope you find inspiration and enjoy my simple and creative ideas.

Connect


COPYRIGHT © 2025 Simply Crafty Life
Privacy & Disclosure | Terms of Service
This site uses cookies to ensure that your user experience is the best on our website. If you continue to use this site, you agree to our use of cookies. OkRead more