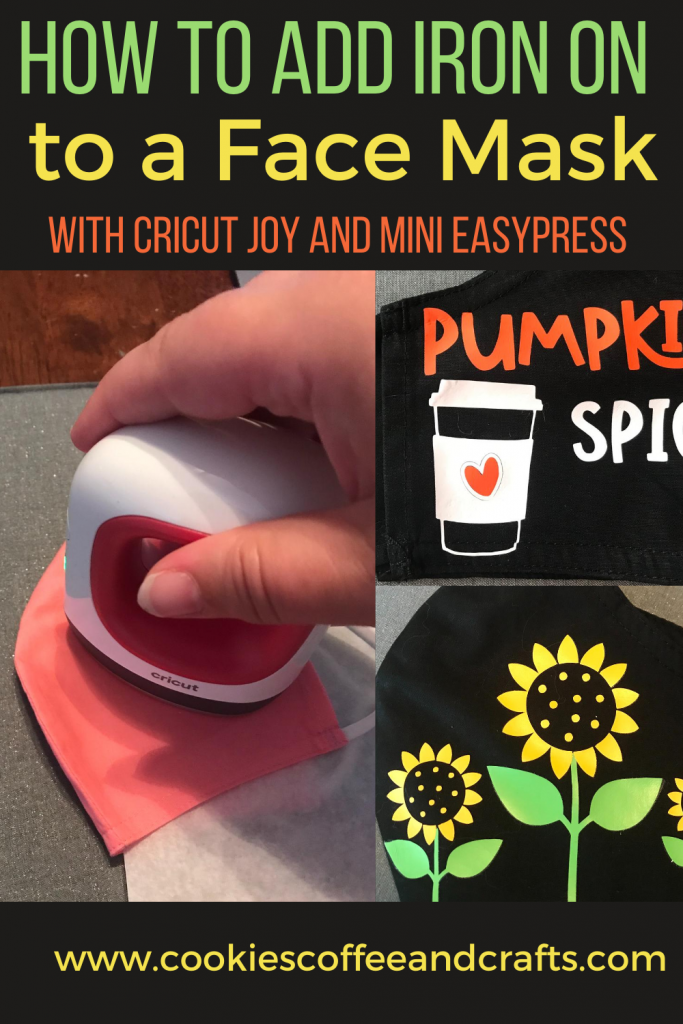
How To Add Iron On to a Face Mask- Let’s Customize It
Note: As an Amazon Associate, I earn from qualifying purchases. If you click on a link from Amazon or another of my advertising affliates, I will earn a small commission at no additional cost to you. Please see my full disclosure policy here.
Who else is still in shock that wearing a face mask has become the “new normal.” Oh how I dislike that term, who’s with me. Now I have no idea how to sew, but I did buy some plain colored face mask from Target. If you do sew, Cricut has tons of face mask that you can make. To personalize them a bit (and to make them not so boring) here is how to to add iron on to a face mask.
I’m no medical expert, but I would recommend putting the design on the side of the mask and not over your mouth where you breath.
This is a great way to add your child’s name or initials to a mask for school or just make fun ones.
Materials for Using Cricut Mini Easypress on Mask
Variety of Different Colored Happy Crafters® Happy Cut Heat Transfer Vinyl
Cricut Joy (Buy on Cricut/Buy on Amazon)
Cricut Mini Easypress (Buy on Cricut/Buy on Amazon)
EasyPress Mat
Cotton Face Mask
Cricut Tools (Buy on Cricut or Buy on Amazon)
Let’s Learn How To Add Iron On to a Face Mask- Let’s Customize It
First measure your mask and choose the size of the design you want. In Cricut Design Space™, choose your design and make it to fit on your mask.
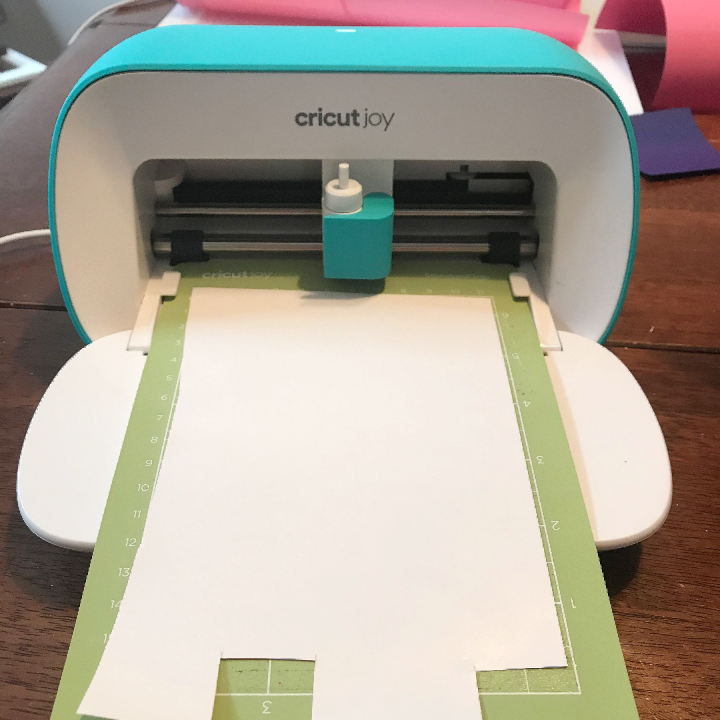
The Cricut Joy was the perfect size machine for this, since the designs are small, but any Cricut Machine will work.
Remember when cutting heat transfer vinyl (HTV)/iron on, put the shiny side down on the mat and make sure to mirror your images. Here is a full tutorial on How To Use Cricut Iron On Vinyl.

Peel away the excess HTV/iron on and weed the designs with your Cricut Tools.
Use your Cricut Easypress Mat or a towel to place the mask on. Then use the Cricut Heat Press Guide. I did put parchment paper between the mask when I heat pressed the first one, but it’s not needed. I didn’t have any issues with the other mask.
Settings for Cricut Easypress Project
For Everyday Iron On:
Preheat for 5 seconds
Medium for 25 seconds
-Constant Movement
-Light Pressure
Flip and Press for 15 Seconds
Warm Peel

Place the mask on the Easypress mat and follow the above settings. I like to lay out all the pieces and get an idea of where to place each of the designs.
Make sure the plastic side of the iron on is up and use the mini easypress to add the iron on decal to the face mask. Just keep moving the mini press and add light pressure. I counted to the seconds for each of the steps and it worked just fine.
Peel off the liner when it’s warm and your mask will be all set.

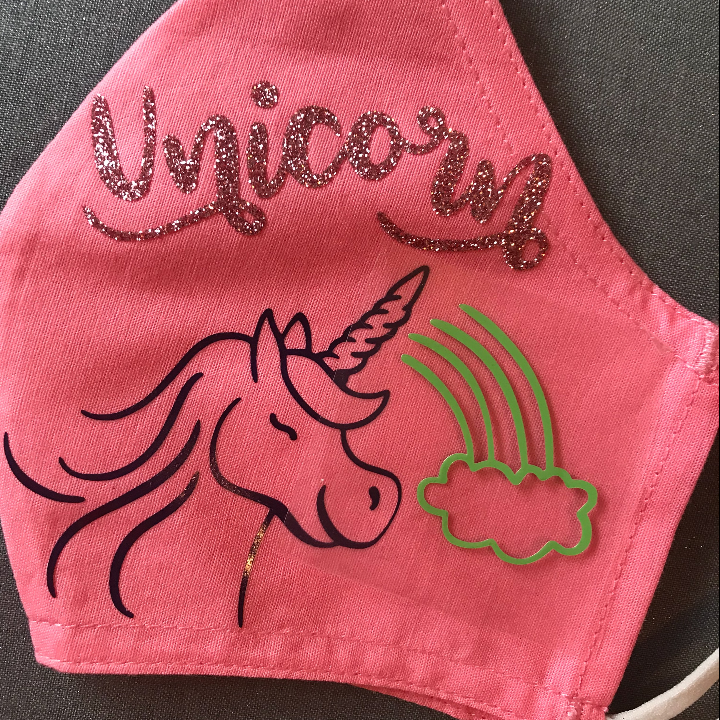
Here are a few that I made! A unicorn one for my daughter (make sure you change the settings for the glitter iron on).
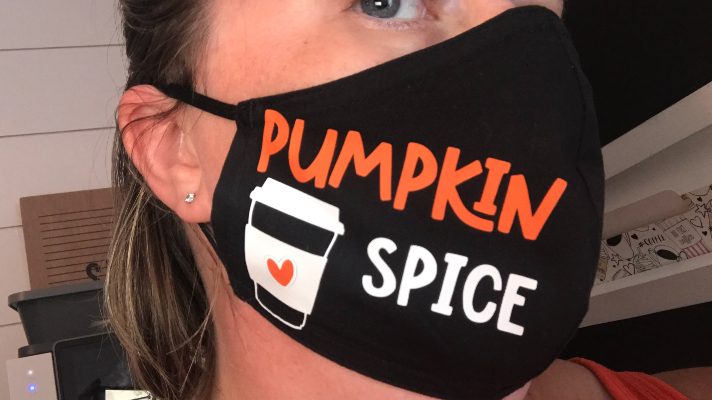
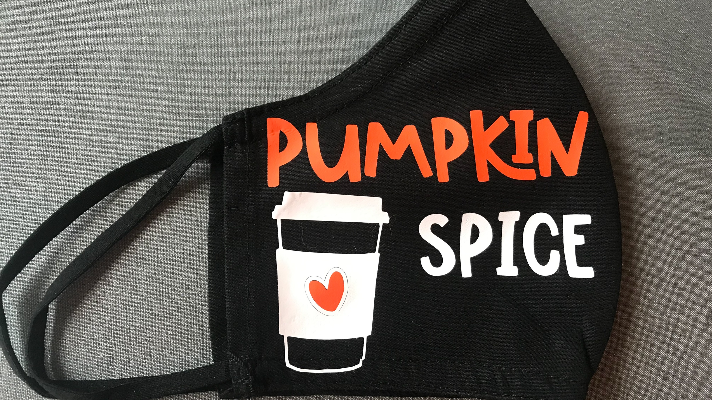
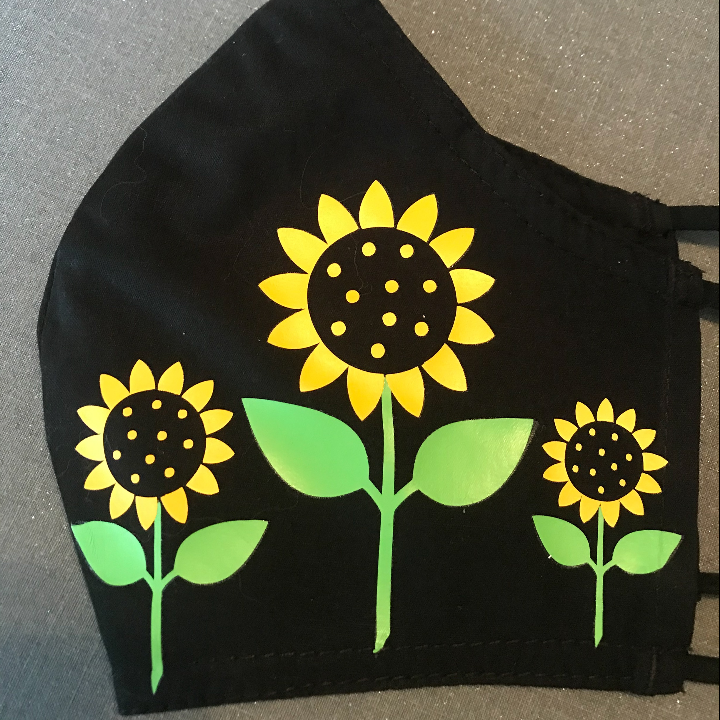
The sunflowers and the pumpkin spice one are for me. I’m getting prepared for the fall.