Making a Wooden Sign with a Picture Frame
Note: As an Amazon Associate, I earn from qualifying purchases. If you click on a link from Amazon or another of my advertising affliates, I will earn a small commission at no additional cost to you. Please see my full disclosure policy here.
I’m all about a beautiful home, but creating a beautiful home can be very expensive. I’ve been working on creating a farmhouse style gallery wall in our kitchen by creating the whole wall with thrift store frames and signs that were given a makeover. This the easiest way for making a wooden sign with a picture frame and the thrift store is full of picture frames.
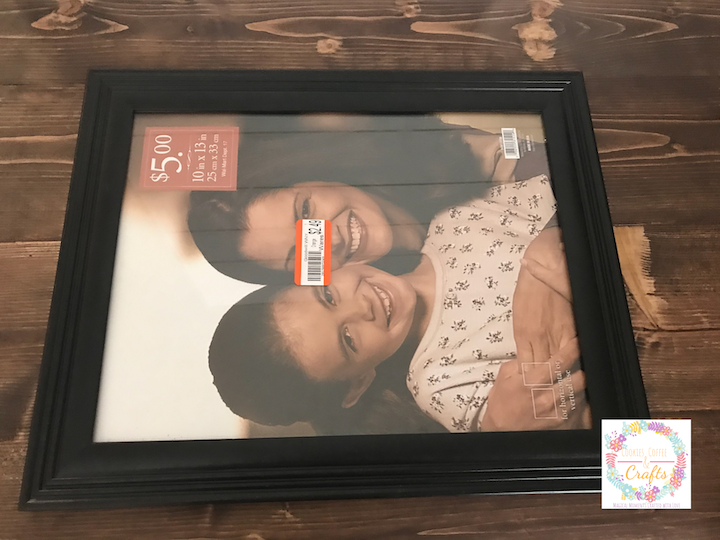
At my local Goodwill (it’s my go to store) I found this 10 x 13 frame for $3.49 and it was 50% off. The great thing was I found another frame too that I made into a baby girl picture frame. I’m excited for the start of the At Home DIY Challenges for the year. Today my DIY friends will be sharing an upcycle of something in their home or from the thrift store (they are so good!).
As a Plaid Ambassador, I was given the paint and paint supplies for this product. All thoughts and opinions are my own.
How to make a Wooden Sign with a Picture Frame
You are probably wondering- how do you make a wooden sign with a frame or what kind of wood do you use or how do you make a picture frame rustic? These are all questions that I can answer because I’ve done this a few times.
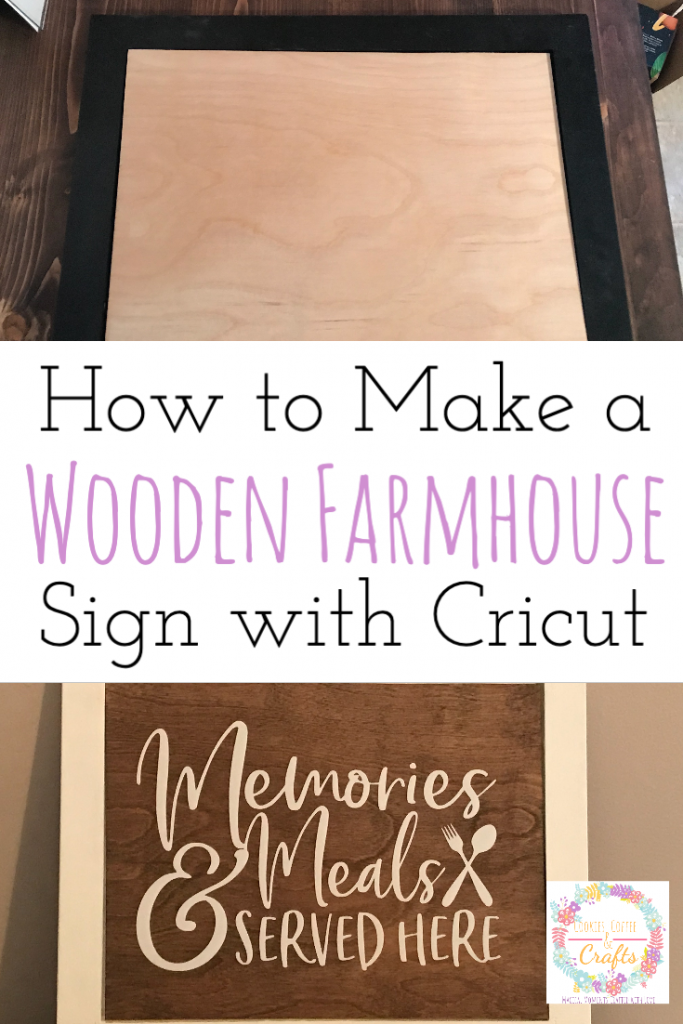
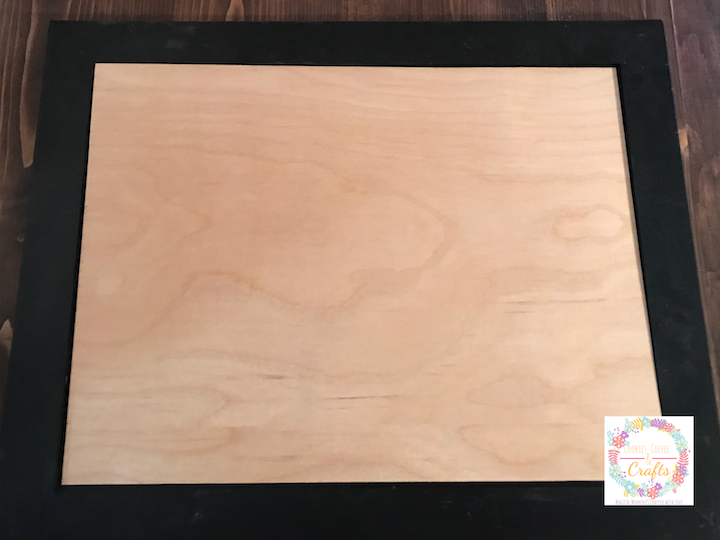
The best kind of wood to use for the sign is a thin 1/4 inch sanded plywood. Just cut it to the size you need and either paint or stain it to match your decor. To make a wooden sign with the picture frame, cut the plywood to fit inside of the frame. My husband and I like the plain look of the back of the frame, which gives it that rustic farmhouse look. Then using chalk paint (with wax) or stain you can make the picture frame look rustic.
Supplies for Easy Farmhouse Sign
10 x 13 Thrift Store Picture Frame
1/4 inch Sanded Plywood
White Adirondack Chalk Paint by Folk Art
Folk Art Clear Wax
Plaid Flat Brush Set
Lint Free Cloth
Wood Glue
Kona Wood Stain
Let’s Create a Wooden Sign with a Picture Frame
To get started, take apart your frame and clean it. You will not being using the glass piece so save it for another project.
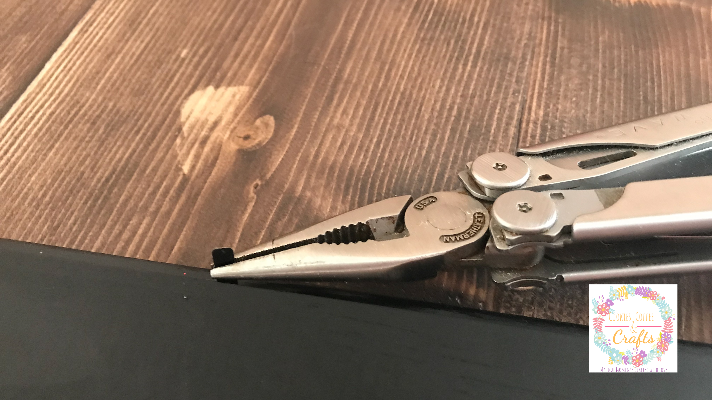
Using a pair of needle nose pliers remove the small black pieces that held in the glass and picture.
Then cut a piece of plywood to fit inside of your frame. For my wall decor, I’m going to be staining the plywood with Varathane Kona to match the decor in our kitchen.
For the thrift store picture frame, I will be painting it with the white Adirondack chalk paint.
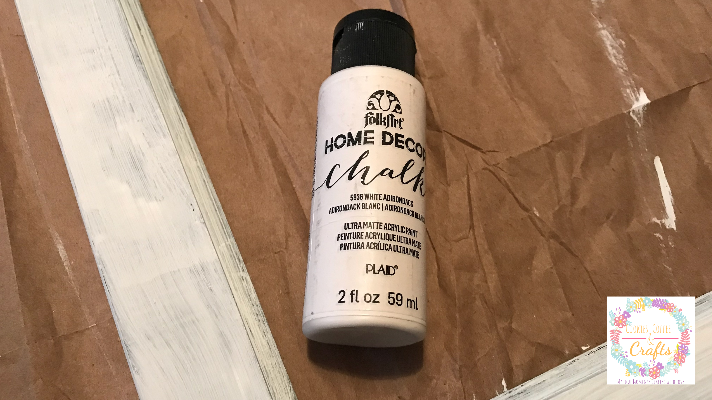
I really like the Folk Art Chalk Paints, they go on smoothly and cover so nice.
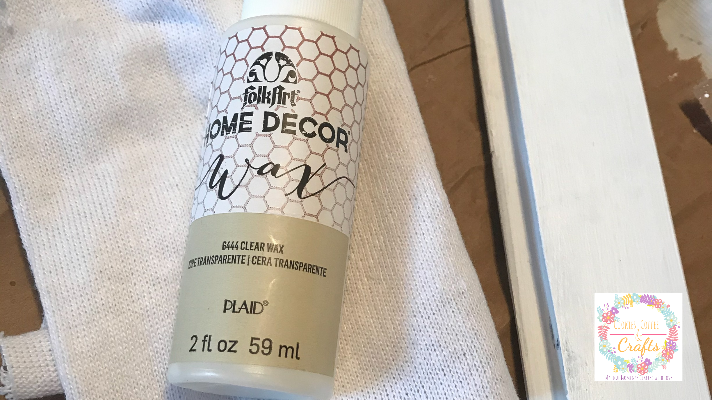
When the frame dried I used a lint free cloth to apply the Folk Art Clear Wax to the frame.
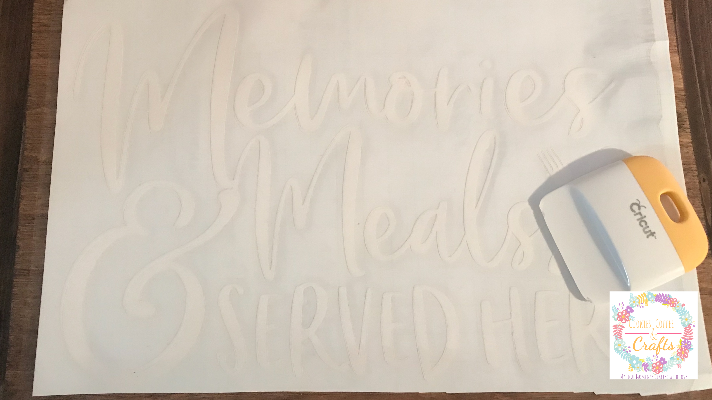
To decorate my farmhouse styled signs, I’m going to be adding on a saying using white vinyl. Memories and meals served here! It’s perfect to go by the kitchen table. I will use my Cricut Maker to upload and cut the SVG, then use transfer tape to add it to the plywood.
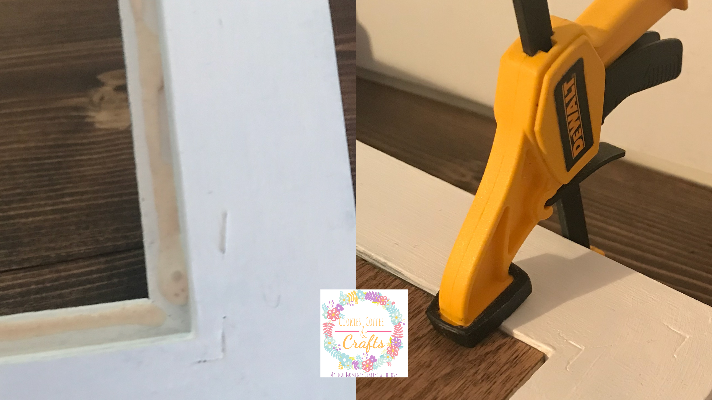
When the plywood insert and the picture frame are dried and ready, it’s time to glue the plywood into the frame using wood glue. Apply the wood glue to the edge of the frame and press the plywood into it. Using small clamps, clamp the plywood into the frame to give it a tight seal for the wood glue to dry.
Wooden Sign with a Picture Frame
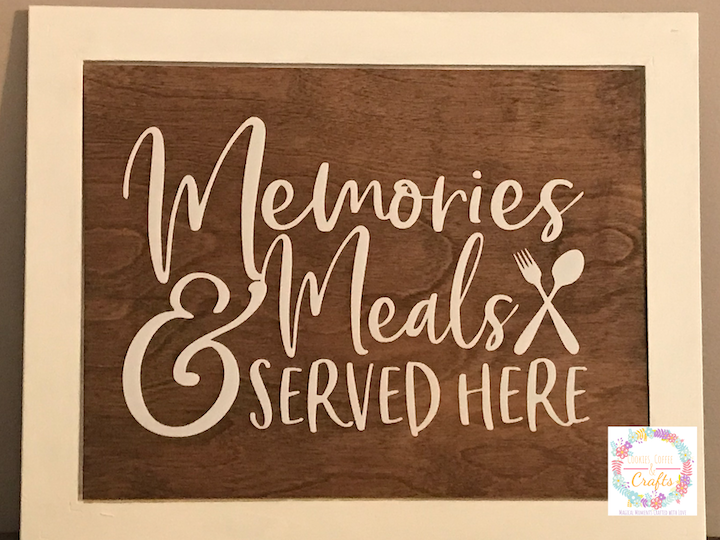
Once your glue dries, you have an easy farmhouse styled sign to hang in your home. The Cricut, a thrift store picture frame and some plywood are the easiest way to make homemade wooden signs (pretty cheap too) for beautiful wall decor.
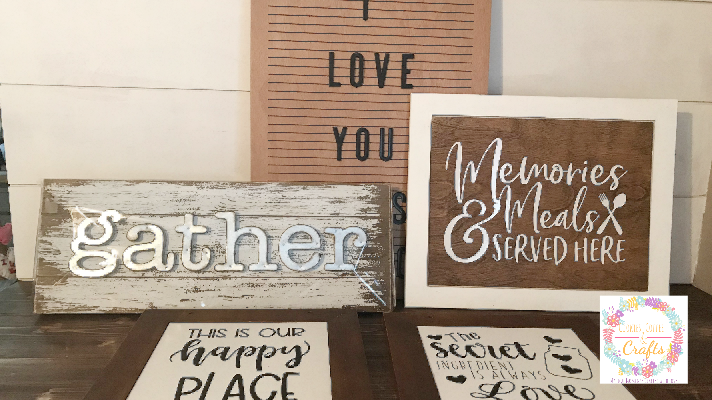
Here is my memories and meals sign with my other kitchen gallery wall pieces that are waiting for me to figure out how to design my wall. If you have a gallery wall let me know because I would love to see it.