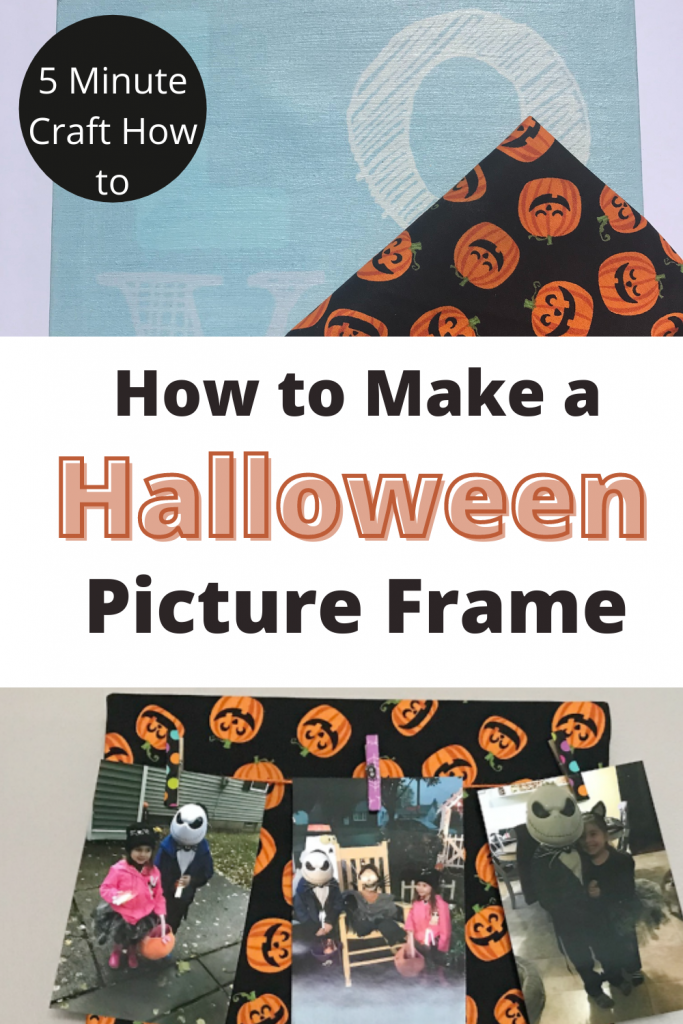
Make a Halloween Picture Frame in 5 Minutes
Note: As an Amazon Associate, I earn from qualifying purchases. If you click on a link from Amazon or another of my advertising affliates, I will earn a small commission at no additional cost to you. Please see my full disclosure policy here.
Do you have an old canvas and don’t know what to do with it? Turn it into an easy Halloween picture frame. I love decorating for the seasons and holidays, but I don’t like to spend a lot of money on it. I’m all about living on a budget. My new Halloween picture frame cost me $3- the canvas was $2 from the thrift store and the fat quarter of Halloween fabric was about a $1. I’ve had this canvas for awhile now in my thrift store pile, but every time I’ve went to use it, the project just never worked out. Finally my DIY craft project worked out.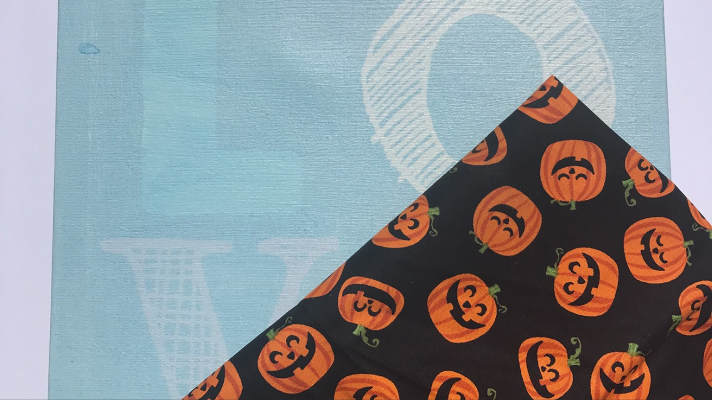
The Rules:
- Upcycle an item(s) from a thrift store, resale store, or garage sale into a new piece of decor.
- There’s no monthly theme.
- There’s no budget to stick to.
Meet the Hosts
Angela | Simply Beautiful By Angela – Kathleen | Our Hopeful Home – Pili | My Sweet Things – Beverly | Across the Blvd – Jenny | Cookies Coffee and Crafts – Allyson | Southern Sunflowers –
Our Thrift Store Upcycle group of bloggers is looking to expand — and we need your help! Why not consider joining in our thrift store upcycle challenge on the last Thursday of each month? Make some friends while having fun and share your love of DIY with the world. It’s a win-win! Sound like something you’d be interested in? Just leave a comment at the end of this post with your contact info and a link to your blog. Someone will get back to you right away. We can’t wait to meet you!
Materials for DIY Halloween Craft
12×12 Canvas Halloween Fat Quarter of Material Staple Gun Orange Twine Mini Natural Clothespins Halloween Washi Tape- Polka Dot Washi TapeLet’s Learn How to Make a Halloween Picture Frame
To get started, iron your material. It’s okay if you don’t get all the seams out because once you pull the fabric tight over the canvas, you won’t see the seams. How cute are these jack o’lantern pumpkins?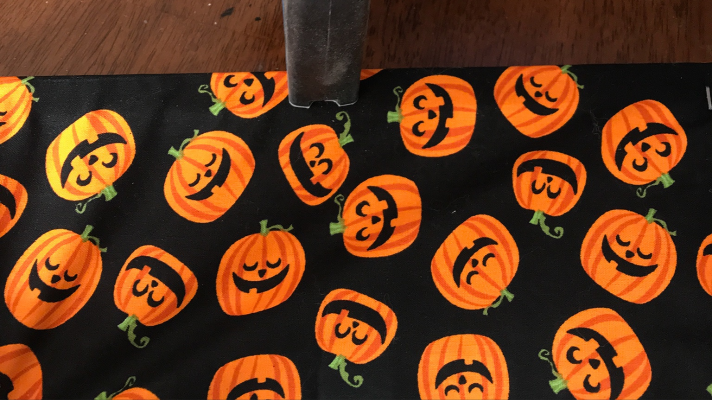 Place your fabric over the canvas, make sure it looks good and flip it over. Wrap the canvas like a present and using a staple gun, staple the fabric to the canvas.
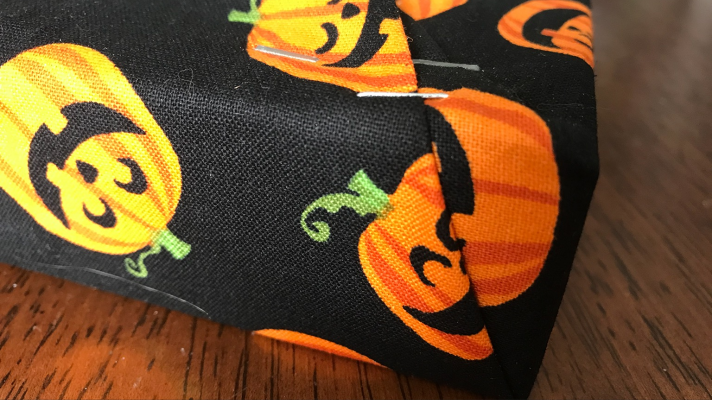 Just think of it as wrapping a present. Remember to pull the fabric tightly.
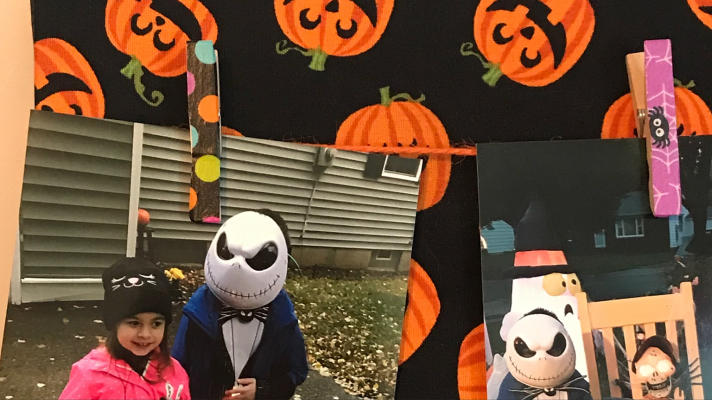
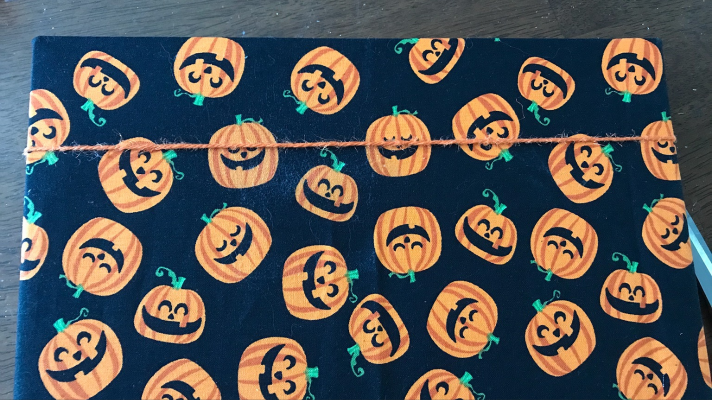 I chose an orange twine from my craft stash and placed it where I wanted it and stapled the orange twine to the back of the frame. The twine fits perfectly with the halloween themed fabric.
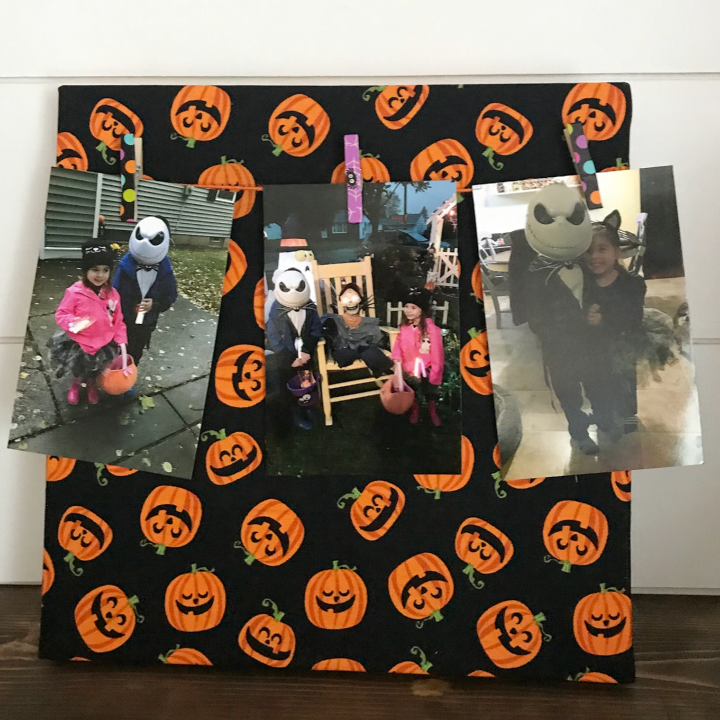
To add more Halloween to the frame, I used some more supplies from my craft stash. I had small medium clothes pins leftover from my Whimsical Embroidery Hoop Display and Halloween Washi tape from my Halloween Washi Tape Picture Frame. I just placed the Washi tape on top of the clothespins and cut off the extra. Super easy and fast.
I chose an orange twine from my craft stash and placed it where I wanted it and stapled the orange twine to the back of the frame. The twine fits perfectly with the halloween themed fabric.
To add more Halloween to the frame, I used some more supplies from my craft stash. I had small medium clothes pins leftover from my Whimsical Embroidery Hoop Display and Halloween Washi tape from my Halloween Washi Tape Picture Frame. I just placed the Washi tape on top of the clothespins and cut off the extra. Super easy and fast.
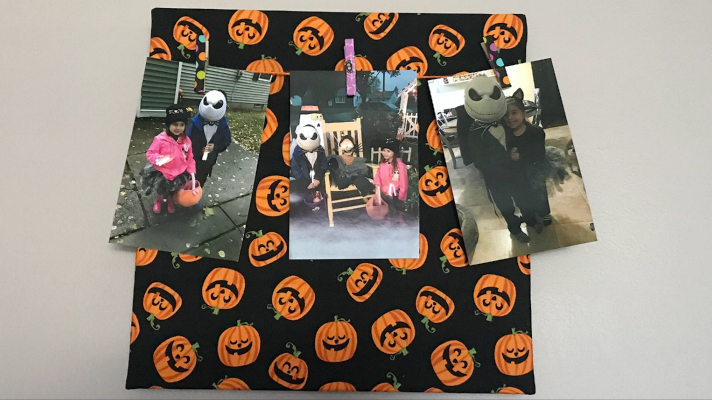 Find some Halloween pictures to add with the clothespins and your Halloween picture frame is ready to hang on the wall or to put on display. The best thing about this decoration idea is that it can be a wall hanging or it can sit on a display.
And now for more thrifty goodness!