Removing Laminate from the Kitchen Cabinets
Note: As an Amazon Associate, I earn from qualifying purchases. If you click on a link from Amazon or another of my advertising affliates, I will earn a small commission at no additional cost to you. Please see my full disclosure policy here.
I’m sharing our journey to our DIY Farmhouse kitchen and the first step is the kitchen cabinets. I’m going to share our journey of removing laminate from the kitchen cabinets. We thought we had wood cabinets with a weird paint job, but we found out we were wrong. Removing laminate from the kitchen cabinets became an adventure, but we didn’t like the look of the cabinets at all. Removing laminate from the kitchen cabinets was not easy, but it’s going to be worth it. Already we have seen huge changes in the kitchen and sometimes it takes hard work and getting dirty.
Below are some affiliate links and I may make a commission for purchases made through the following links.
This our first large DIY project so we are by no means experts and we are learning as we go. I hope this post can help someone who finds themselves in the same situation.
Getting Started on Removing Laminate from Kitchen Cabinets
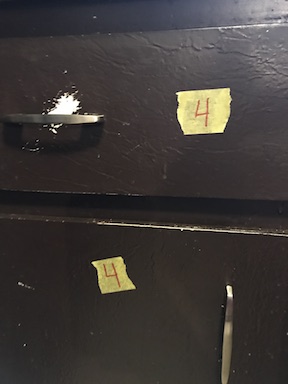
First step is to label all the cabinets/drawers and label bags to put the hardware in. We labeled the doors with painters tape and a sharpie.
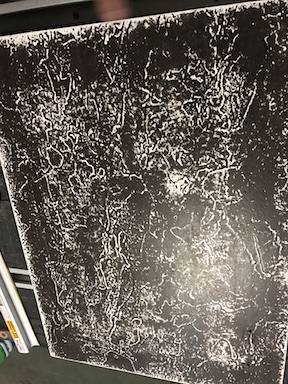
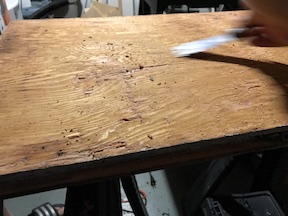
Then my husband started sanding them and knew right away it was not wood.
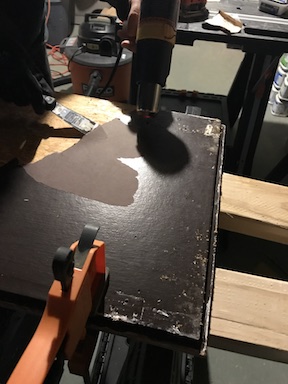
We had to regroup and decide what to do. I called my parents for advice because they have been DIY-ers for as long as I can remember and my dad has tons of tools. My mom remembered my dad has a heat gun so we went to get it. The Heat Gun worked great to remove the laminate. My husband clamped it to his Work Table with Clamps
, heated up the laminate, and then used a putty knife to scrape it off.
Removing the Laminate from the Kitchen Cabinets, but What About the Glue?
Once again we found ourselves with a new problem-How to Remove the Glue from the Cabinets? We tried many ways to remove the glue- the heat gun (no), sanding (no), but finally we found a life saver. We tried all the above methods for hours and knew we had to find a better way.
This is the life saver! To get some, click here.
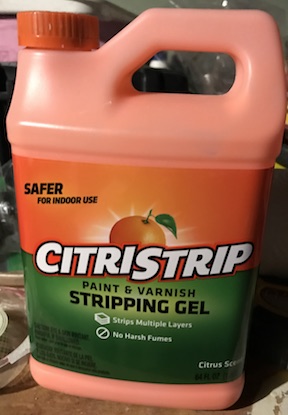
You lather up the cabinets by using a paint brush to put on the “lifesaver”, let it sit for 30 minutes and start scrapping. This took less time and removed almost all the glue. My husband did find it helpful to wear gloves.
Another great thing about the “lifesaver” is its safe for indoor use, has a nice orange smell, and isn’t super dangerous like other strippers. Honestly I get migraines from smells (I’m very sensitive to them) and this didn’t bother me at all.
Now that the laminate has been removed from the kitchen cabinets, I have started stripping the bottom cabinet frame using the “lifesaver”. This worked great on the paint to and removed almost all of it. Now we just have to sand the cabinet frame and do a final sanding on the kitchen cabinet doors. Then I’m going to paint the inside of the cabinets white and put on pretty contact paper to protect the shelves in the cabinets. I’m thinking about getting this one. For the cabinet doors my husband will start putting on the shaker style.
Already we feel the kitchen seems brighter with half the dark brown cabinets gone. For a color scheme we are using dark gray for the bottom cupboards and white cupboards on the top.
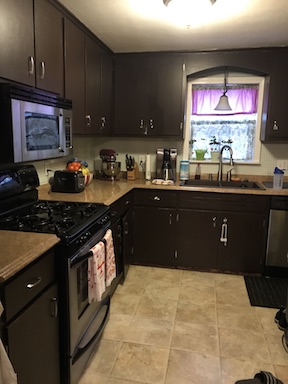
This is our kitchen before:
I can’t wait to share after shots, but we are not there yet. We are going to be putting on butcher block counter tops, beadboard backsplash, and so much more. This is all going to take time since we work on it in our free time. If your thinking of getting started follow the advice of one of my favorite HGTV host “just get up and do it.”


