Rustic DIY Bunny Sign (with Cricut)
Note: As an Amazon Associate, I earn from qualifying purchases. If you click on a link from Amazon or another of my advertising affliates, I will earn a small commission at no additional cost to you. Please see my full disclosure policy here.
I’ll admit, I have a buffalo check/plaid obsession. When I saw this pin for a buffalo check bunny sign, I knew I had to have one. The purpose of the Pinterest Challenge is to motivate all the participants (and you too) to not just pin, but to make it happen! This month’s challenge is about Spring Crafts/DIY Projects, so I chose to make a Rustic DIY Bunny Sign (with Cricut).
As a Plaid Ambassador, I was given the Mod Podge and supplies for this bunny sing. All thoughts and opinions are my own.
TO JOIN NEXT MONTH’S #PINTERESTCHALLENGE, CLICK HERE TO SIGN-UP ⇒ March Pinterest Challenge
Supplies for DIY Wooden Bunny Sign
Plywood 8×10
1×2
Wood Stain
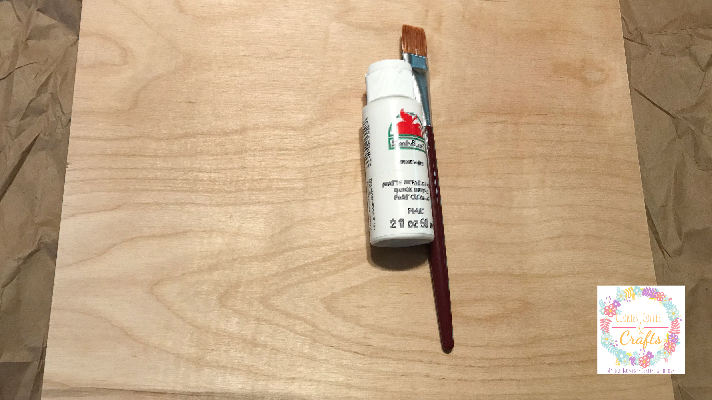
Apple Barrel White Craft Paint
Mod Podge Decoupage Brushes
Plaid Flat Brush Set
Fabric Mod Podge
Pink plaid fabric
Cricut Maker
Rotary Blade
Let’s Create a Rustic DIY Bunny Sign
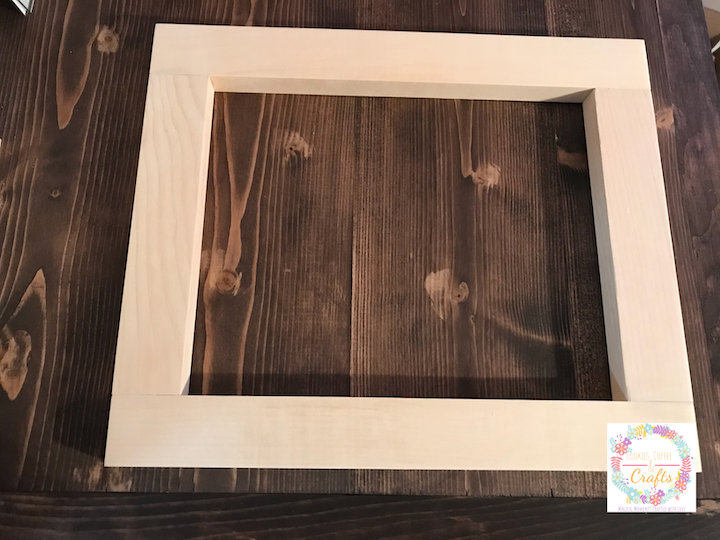
The first step is to decide on the size of your sign. I went with 8×10 for my sign. My husband cut the plywood 8×10 and made the frame out of the 1×2.
I painted the plywood with white craft paint for the backing. Then I stained the frame with Kona Wood Stain. While these both dried I worked on making the bunny for the sign.
Creating the Bunny Outline in Fabric with the Cricut Maker
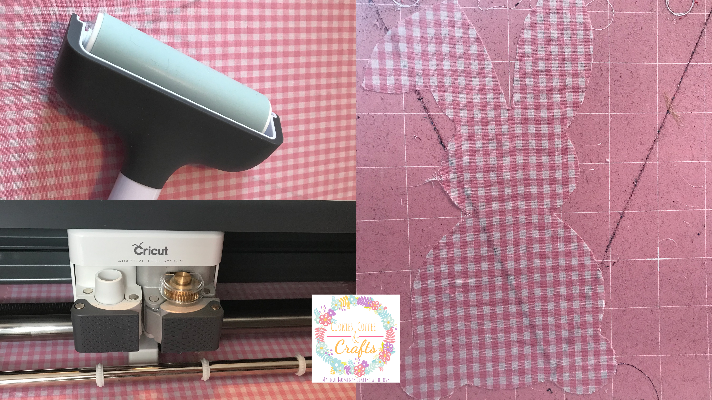
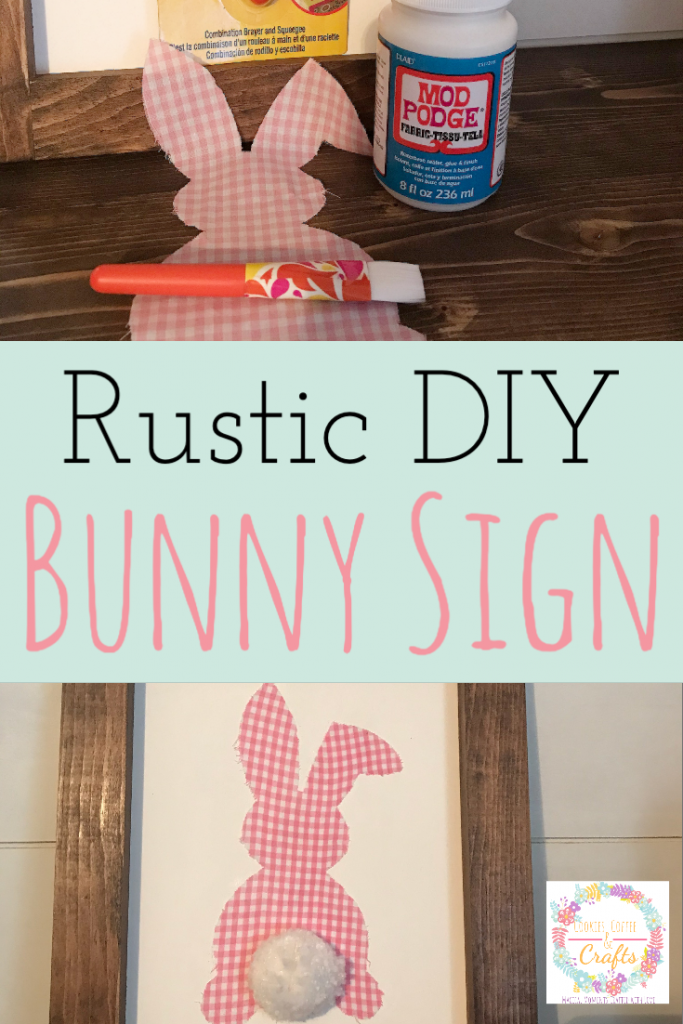
In Cricut Design Space™ I uploaded an outline of a bunny with a bent ear because it’s so cute. Then once I sized it to fit the 8×10 frame, I hit make it. I did mirror image so the bunny would be cut on the good side of the fabric with my Cricut maker. Also make sure you use the rotary blade and the fabric mat. If you want to know more about cutting fabric with the Cricut maker I have a full tutorial.
Once everything dried my husband nailed the plywood to the back of the frame. Then I went back and stained the side of the plywood once it was attached to the frame. My husband has is eye on a new tool to make the indentation so the plywood would fit inside the frame.
Using Fabric Mod Podge to Add the Bunny to the Rustic Sign
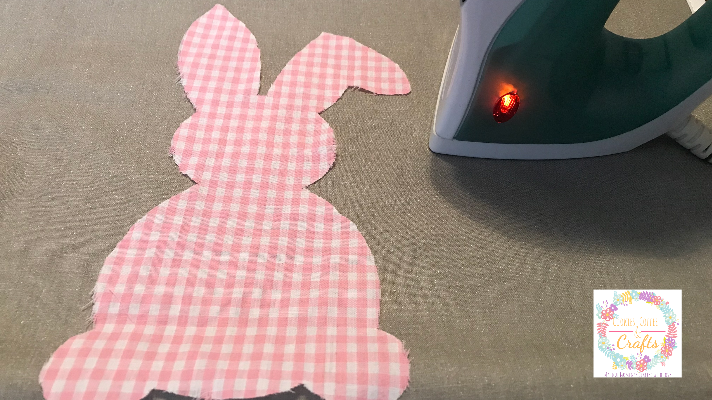
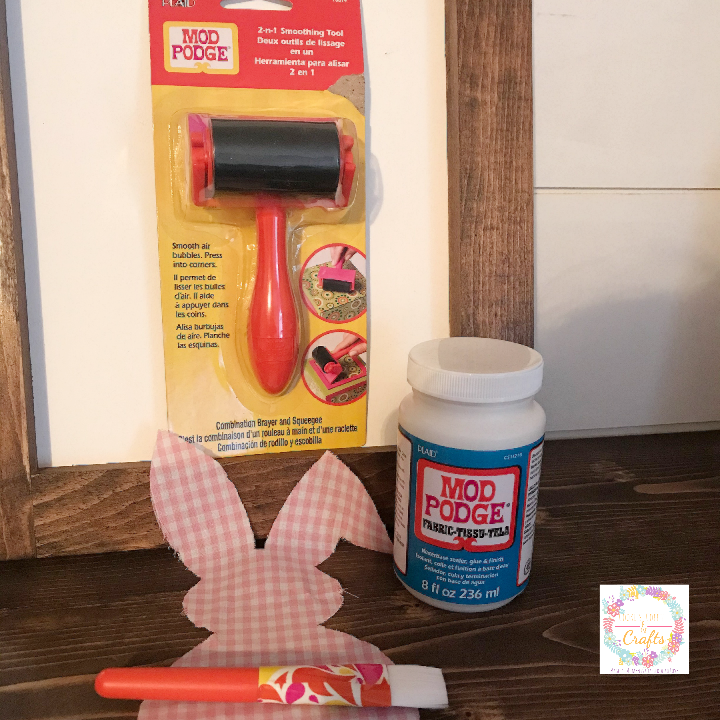
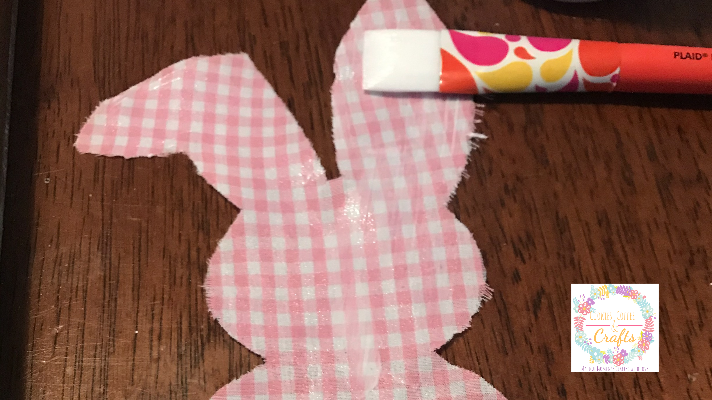
Now it’s DIY time to add the pink plaid fabric bunny to the rustic wooden sign. To get the bunny read for the sign, iron your fabric so all the wrinkles are out. Then apply a layer of fabric mod podge to the back of the bunny using the Fabric Mod Podge and decoupage brushes.
Here is the tricky part, carefully get your bunny where you want it on the sign. I should have place my bunny where I wanted it on the wood sign and then applied the mod podge to half the bunny. Then repeat. Oops, but you live and learn when creating something new. I used the Mod Podge Smoothing Tool to get out any bubbles. Remember don’t shake your Mod Podge because shaking causes bubbles.
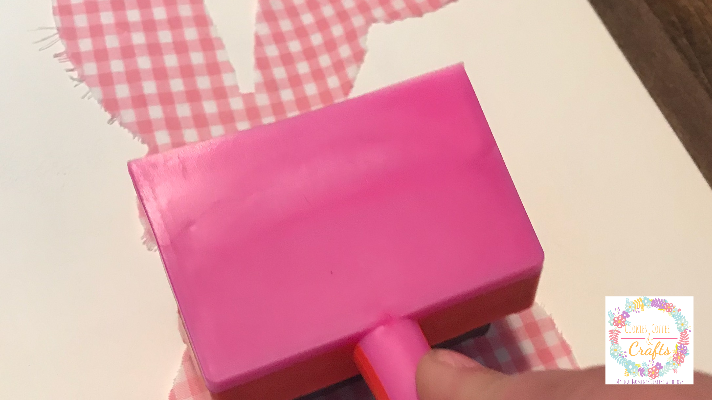
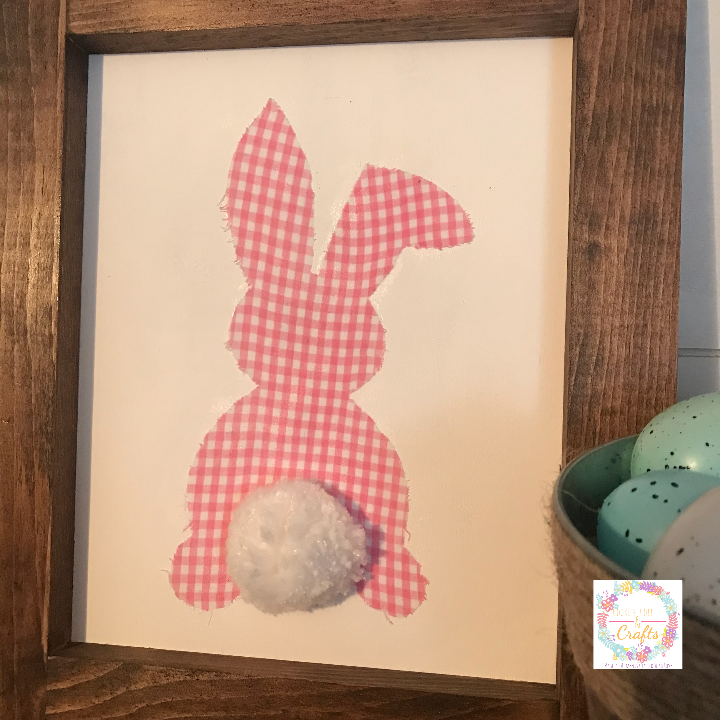
I waited about 20 minutes and then I applied a top layer to the fabric using the mod podge.
After it dried, I added on the bunny pom pom tail. My parents have a pom pom maker because my mom knits hats and my dad makes the pom poms. So my dad made me a couple sizes of bunny tails out of white yarn. It was a hard choice of which tail size to choose, but I went with the bigger tail. Bunnies do have the cutest fluffiest tails ever.
Rustic DIY Bunny Sign (with Cricut)
The best thing about this sign is that it’s perfect for spring and Easter. The pastel pink plaid, the white and the wood are such a pretty combination. I’m happy with how my rustic DIY Bunny Sign, so remember to not just pin, but make something fun too!

For more Pinterest inspired projects from this month’s Pinterest Challenge hosts, check out the links below ↓

My Pinterventures • Domestic Deadline • Across the Boulevard
Cookies Coffee and Crafts • Farm Girl Reformed • Slices of Life
Decorate and More with Tip • Mom Home Guide • Purple Hues and Me
Intelligent Domestications • Sew Crafty Crochet • Life Beyond Kitchen
Modern on Monticello • Sum of their Stories
Love My Little Cottage • EyeLoveKnots
Create with Cynthia • This Autoimmune Life
Now, let’s see what the other hosts have created ⇓⇓